A dishwasher panel is often the first thing guests notice in your kitchen, yet many homeowners overlook it during renovations. Whether you’re updating a sleek kitchen with stainless steel or blending your appliance into custom cabinetry, the dishwasher panel affects both aesthetics and function. This guide covers everything from understanding panel types and choosing the right style to installing and maintaining them. You’ll learn what makes a quality dishwasher panel, which materials suit your kitchen, and how to handle common maintenance issues without calling a professional.
Table of Contents
ToggleKey Takeaways
- A dishwasher panel is the visible front face of your dishwasher that impacts both kitchen aesthetics and functionality, protecting the appliance while completing your design vision.
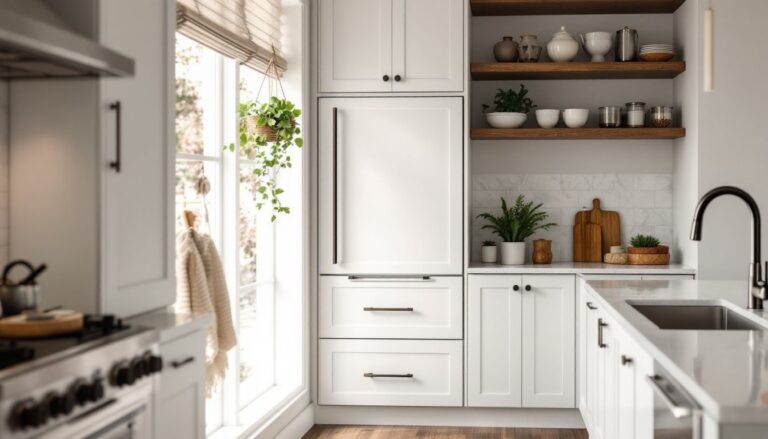
- Stainless steel panels dominate modern kitchens for their fingerprint resistance and professional appearance, while wood and integrated cabinetry options offer seamless design integration.
- Proper installation of a dishwasher panel requires precise measurements, appropriate shims for leveling, and sealed gaps to prevent moisture damage and warping.
- Stainless steel panels require weekly cleaning with the grain and soft cloths, while wood panels need immediate spill cleanup and quarterly checks for water damage at the base and edges.
- A dishwasher panel upgrade is one of the simplest DIY kitchen refresh projects, delivering immediate visual results without structural complexity in just a weekend.
What Are Dishwasher Panels and Why They Matter
A dishwasher panel is the exposed front face of your dishwasher, the door or trim kit that’s visible when the appliance is closed. It’s distinct from the internal door, which seals the tub. Panels serve two purposes: they complete your kitchen’s visual design and protect the dishwasher’s sides and edges from damage and moisture.
Most modern dishwashers come as either built-in (integrated into cabinetry) or free-standing. Built-in models often require a custom panel or trim kit to match surrounding cabinets, while free-standing units have a factory-finished panel included. A poorly chosen or damaged panel undermines an otherwise polished kitchen. Conversely, the right panel can tie a room together, and upgrading an old one is one of the simplest kitchen refresh projects you can tackle.
Panels also affect usability. A panel with a control board layout that’s intuitive and buttons that are easy to reach makes operating your dishwasher less frustrating. Panels that don’t fit snugly allow heat and moisture to escape, reducing drying efficiency and potentially damaging surrounding cabinetry over time.
Popular Dishwasher Panel Styles and Materials
Stainless Steel and Metal Finishes
Stainless steel is the dominant choice in modern kitchens. It resists fingerprints (especially brushed finishes), matches appliances, and conveys a professional look. Standard stainless steel panels are typically between 1/16″ to 1/8″ thick and attach via a frame or adhesive backing.
Black stainless steel and copper finishes are gaining traction for contemporary and transitional spaces. These trends demand more frequent cleaning since fingerprints show readily, but the visual impact can justify the maintenance. If you’re considering a metal finish, test samples under your kitchen lighting, finishes read differently depending on how light plays off the surface.
Glass panels are less common but appear in modern, minimal kitchens. They’re harder to keep clean and don’t offer sound dampening, but they create a striking focal point. Aluminum and composite metal panels offer lighter weight alternatives if your dishwasher opening has weight restrictions.
Wood and Integrated Cabinetry Options
Integrated panels that match your cabinetry are essential if you prefer a seamless look. These panels are typically constructed from 3/4″ plywood or medium-density fiberboard (MDF) with a veneer or paint finish matching your cabinets. They’re custom-fit and often require professional installation because precision matters, gaps or misalignment throw off the entire kitchen’s visual flow.
Raised-panel, shaker-style, and flat-front designs are the most popular. Raised panels add visual depth and work well in traditional and transitional kitchens. Shaker panels (flat with clean lines) suit farmhouse and contemporary spaces. Flat-front veneered panels offer a sleek, minimalist appearance.
Finishes matter too. A painted panel should use a high-quality, kitchen-grade paint (at least semi-gloss or satin) that resists moisture and wiping. Stained or natural wood veneers require regular sealing to prevent water damage around the dishwasher’s base and edges. Wood panels are less forgiving of bumps and spills than metal ones, so factor in maintenance when deciding. The Kitchn explores kitchen design trends that can help you visualize how different panel styles influence your overall aesthetic.
How to Install and Replace Dishwasher Panels
Installation varies dramatically depending on whether you’re fitting a trim kit on a free-standing unit or building and attaching a custom cabinet panel. Free-standing units are straightforward: custom integration is more involved.
Materials and tools you’ll need:
- Panel (trim kit or custom-built)
- Drill-driver with bits
- Screwdriver (Phillips and flat)
- Shims (plastic or wood, 1/8″–1/2″ thickness)
- Level (a 24″ torpedo level works well)
- Measuring tape and pencil
- Safety glasses
- Work gloves
- Caulk and paintable caulk gun (if sealing gaps)
For a factory trim kit on a free-standing dishwasher:
- Turn off the dishwasher and ensure it’s cool and empty.
- Unscrew and remove the factory panel if one exists (usually 4–6 screws along the sides).
- Install the new trim kit according to manufacturer instructions, typically sliding rails into grooves on the dishwasher’s frame and securing with screws. Don’t overtighten: metal can strip.
- Check that the panel sits flush with surrounding cabinetry using a level. Adjust shims if needed.
- Ensure all screws are snug but not over-torqued.
- If gaps remain between the panel and cabinet, apply paintable caulk and smooth with a wet finger.
For a custom cabinet panel on a built-in dishwasher:
- Measure the dishwasher opening precisely: width, height, and depth. Account for the frame and any existing trim. Measure three times.
- Build or order the panel. It should be 3/4″ thick to align with standard cabinet depth.
- Place shims under and on the sides of the dishwasher frame to ensure it’s perfectly level and plumb.
- Attach the panel to the dishwasher frame or cabinetry using 1.25″–1.5″ wood screws (4–6 screws total: two top, two bottom, potentially one each side).
- Check for square and flush alignment before fully tightening.
- Seal around the perimeter with paintable caulk if the panel abuts cabinetry. This prevents moisture from seeping behind.
Common mistakes:
- Skipping measurement verification. Panels that are slightly too big or too small are impossible to fix in place.
- Overtightening screws, which can warp a plywood panel or strip screw holes.
- Forgetting shims. An unshimmed dishwasher door won’t close properly and stresses the hinges.
- Not sealing gaps. Water can wick behind wood panels and cause swelling, warping, and mold.
How to Replace a Dishwasher Control Panel provides a detailed tutorial if your control board or buttons fail, a separate issue from the panel facing but often confused with it.
If the dishwasher itself requires removal or relocation, that’s structural work. Leave it to a plumber (water lines) and electrician (power). Panels are where DIY excels.
Maintaining and Cleaning Your Dishwasher Panels
Regular maintenance extends panel life and keeps your kitchen looking sharp.
For stainless steel panels:
Clean weekly with a microfiber cloth and mild dish soap or a dedicated stainless steel cleaner. Always wipe with the grain to avoid scratching. Avoid abrasive scrubbers and chlorine-based cleaners, which dull the finish and can cause pitting. Fingerprint-resistant wax or oil (sold at hardware stores) can restore luster if the panel looks dull.
If the panel develops a water spot or light rust, a food-grade oil (mineral oil or olive oil) applied with a soft cloth often removes it. Stubborn spots may require a stainless steel polish, test on an inconspicuous spot first.
For wood and painted panels:
Wipe spills immediately with a slightly damp cloth: prolonged moisture causes swelling and finish damage. Use a wood-safe cleaner (avoid oil-based products unless your panel is sealed with oil) and dry thoroughly.
Check the base and sides of the panel quarterly for signs of water damage: soft spots, discoloration, or swelling. These indicate moisture intrusion, usually from condensation or leaks. If caught early, resealing may prevent further damage. If the panel is beyond saving, replacement is straightforward, remove the old panel’s fasteners and install a new one using the same holes (they’re usually pre-drilled).
Paint panels may need touch-ups if they chip or fade. Use the same paint or a close match, sanding lightly first to ensure adhesion.
For all panels:
If your dishwasher leaks water around the panel base, the issue isn’t the panel, it’s likely a door seal or internal problem. Dishwasher repair costs vary depending on the problem, but ignoring leaks accelerates water damage to flooring and surrounding cabinets. Address leaks promptly.
Avoid slamming the door. It stresses hinges and can misalign the panel over time, creating gaps that trap moisture. Train household members (especially kids) to close gently.
Never use the panel as a hand-hold to pull the dishwasher open. Use the handle only. Pulling on the panel edge can bend the frame, crack veneer, or loosen fasteners.
Conclusion
A dishwasher panel is a small detail with outsized impact on your kitchen’s finished look and function. Whether you choose sleek stainless steel, integrated cabinetry, or a contemporary metal finish, investing in quality materials and careful installation pays dividends. Maintenance is straightforward, mostly regular cleaning and prompt attention to leaks or damage. For most homeowners, upgrading or replacing a panel is a weekend project that delivers immediate visual results without structural complexity.