A copper range hood isn’t just a functional workhorse, it’s a design statement that brings warmth and character to your kitchen. Unlike stainless steel’s clinical shine or painted finishes that chip over time, copper develops a rich patina as it ages, making each hood uniquely yours. Whether you’re renovating your entire kitchen or simply upgrading a tired exhaust fan, a copper range hood can tie together modern and traditional styles while improving air quality and adding resale appeal. This guide walks you through selecting the right copper range hood for your space, installing it properly, and maintaining that signature finish for years to come.
Table of Contents
ToggleKey Takeaways
- A copper range hood develops a rich patina over time that improves with age, offering both aesthetic appeal and practical antimicrobial benefits that resist bacteria growth better than many other metals.
- Copper range hoods come in multiple functional styles—under-cabinet, wall-mount, island, and downdraft—and your choice depends on cooktop location, kitchen layout, and desired CFM capacity (minimum 100 CFM for electric, 150 CFM for gas cooktops).
- Proper installation requires precise measurements, rigid metal ductwork (6-8 inches), adequate structural support (copper hoods weigh 80+ pounds), and may require licensed electrician work for 240-volt circuits and combustion air compliance.
- Brushed or lacquered copper finishes require less maintenance than polished copper, needing only weekly dusting and monthly grease filter cleaning rather than constant polishing to prevent tarnishing.
- Styling a copper range hood effectively means pairing it with warm metal finishes (brass, gold), neutral backsplashes, and calm surrounding colors so the hood serves as the kitchen’s visual centerpiece.
- A well-installed copper range hood improves kitchen resale value and signals quality to appraisers, making it one of the highest-ROI home improvements you can choose.
Why Copper Range Hoods Are a Smart Design Choice
Copper has been a kitchen and bath material for centuries, and it’s making a strong comeback in 2026. Beyond looks, copper offers real practical benefits. It’s naturally antimicrobial, meaning it resists bacteria growth better than many other metals, a genuine hygiene advantage when dealing with cooking fumes and splatters. Copper also conducts heat efficiently, which helps with airflow dynamics in your hood’s ductwork.
From a design perspective, copper works across nearly every aesthetic. In farmhouse kitchens, it echoes traditional cookware and vintage fixtures. In contemporary spaces, a sleek copper hood adds an unexpected warm accent that softens minimalist design. Industrial kitchens benefit from copper’s visual weight and the way it catches light. Unlike trendy finishes that feel dated in five years, copper actually improves with age, the natural oxidation creates a patina that deepens character rather than diminishing it.
The finish options matter here. Polished copper stays shiny and bright but requires regular maintenance to prevent tarnishing. Brushed or hammered copper hides fingerprints and patina development better, making it lower-maintenance. Some manufacturers apply a clear lacquer or wax coating to slow oxidation, giving you a choice between active patina development and a more stable appearance.
Installing a copper range hood also signals quality to appraisers and future buyers. Kitchen upgrades consistently rank among the best ROI improvements, and a distinctive, well-made hood suggests attention to detail throughout the entire space.
Types of Copper Range Hoods to Consider
Copper range hoods come in several functional styles, and your choice depends on your cooktop location and kitchen layout. Understanding the differences helps you pick the right hood for both performance and aesthetics.
Under-cabinet hoods mount flush against the cabinet bottom directly above a stovetop. They’re compact, affordable, and work well in small kitchens or apartments. But, they provide less capture surface than larger designs, so you’ll need adequate suctioning power (measured in cubic feet per minute, or CFM). Most residential building codes require a minimum of 100 CFM for electric cooktops and 150 CFM for gas, check your local code as requirements vary by jurisdiction.
Wall-mount hoods (also called chimney or stack hoods when they’re boxed in) extend from the wall and offer higher capture capacity. These work beautifully as design focal points, especially in kitchens with open shelving or islands.
Downdraft hoods pull air down and away through floor-mounted ductwork, useful when cooktops sit on islands with no wall nearby. Downdrafts are less efficient than vertical or wall-mounted options and require more ductwork effort, making them a compromise choice.
Island vs. Wall-Mount Designs
If your cooktop sits on an island, you need an island hood (essentially a wall-mount style that hangs from the ceiling). Island hoods are design-forward pieces, they’re visible from all angles, so aesthetic quality matters as much as function. A copper island hood becomes a sculptural centerpiece.
Wall-mount hoods suit cooktops against exterior walls or windows. They’re easier to vent (shorter ductwork to exterior), cheaper to install, and can integrate into cabinetry. Many homeowners prefer them because the ductwork runs through the wall cavity, keeping your ceiling clean.
The Houzz collection of 75 copper range hood ideas showcases both configurations, and you’ll notice the polished versus patina finishes read very differently depending on whether the hood is framed by cabinetry or standing alone in a kitchen.
Installation Tips for Homeowners
Before you buy, measure twice. You’ll need to know your cooktop width (not the range width, the actual cooking surface), the distance from cooktop to the underside of the cabinet or ceiling, and whether you’re venting through the roof, side wall, or soffit. Copper hoods typically run 30, 36, 42, or 48 inches wide: the hood should extend at least 3 inches beyond the cooktop on each side for proper capture.
Ductwork sizing is critical. Most residential hoods need a 6-inch diameter duct running to exterior. Smaller ducts restrict airflow and force the motor to work harder, shortening its lifespan. If you’re running a long duct run (over 25 feet), you may need 8-inch ducting or additional CFM capacity. Avoid flexible dryer vent hose, it’s a fire hazard and doesn’t meet code for range hoods. Use rigid metal ductwork or insulated flex duct rated for high-temperature appliance exhaust.
Electrical work usually requires a 240-volt or 120-volt circuit depending on the hood’s motor. If you don’t have an existing hood circuit and you’re not comfortable running new wire, hire a licensed electrician. Most codes require either a dedicated circuit or proper load calculations, and inspectors will verify this.
Mounting considerations: Check whether your hood requires blocking (structural support between studs or joists) to handle its weight. Copper hoods are solid metal and heavier than you’d expect, a 42-inch hood easily weighs 80 pounds or more. Wall studs 16 inches on-center can usually support this, but island hoods hanging from joists need proper reinforcement.
Start by turning off power to any existing hood circuit at the breaker. If replacing an old hood, disconnect the ductwork, remove fasteners, and support the old unit before unbolting. Install ducting and supports for the new hood before mounting it, working from above gets cramped fast. Once the hood is mounted and level, connect ductwork with hose clamps (not duct tape, that’s a fire code violation).
Family Handyman’s range hood installation guide covers the core steps in detail, and it’s worth reviewing before you start even if you’re hiring someone. You’ll understand what a pro should be doing and avoid surprises.
If your cooktop is gas, check whether the hood needs to pull fresh air into the kitchen (combustion air). Some jurisdictions require makeup air systems for high-CFM gas range hoods to prevent backdrafting and carbon monoxide issues. This isn’t a DIY task, it’s a code compliance issue that demands professional assessment.
Maintaining Your Copper Range Hood
Copper’s living finish means maintenance differs from stainless steel. The choices you make early on shape how much work you’ll invest long-term.
For polished copper, plan on monthly cleaning. Use a soft cloth and a pH-neutral copper cleaner (avoid acidic vinegar or lemon juice for now, save those for tarnish removal). Dry immediately to prevent water spotting. Fingerprints show readily on polished surfaces, so you’ll notice them. This look rewards attention but isn’t for everyone.
Brushed or lacquered finishes need less frequent care. Dust weekly with a microfiber cloth, and wipe down cooking splatter with a damp cloth as it happens. The brushed texture hides fingerprints and minor imperfections, making this the practical choice for busy kitchens.
Grease filter maintenance matters most. Copper hoods usually ship with baffle filters (stainless steel baffles that direct airflow and trap grease) or mesh filters. Remove and clean these every 1–2 months depending on cooking frequency. Soak them in hot soapy water, scrub gently with a soft brush, and rinse thoroughly before reinstalling. A clogged filter reduces hood effectiveness dramatically and strains the motor.
If your copper develops a dark patina and you want it polished again, use a copper-specific polish and follow the product directions carefully. Aggressive scrubbing can scratch the surface. If the patina appeals to you, leave it alone, it’s the hood aging naturally, not deteriorating.
Inspect ductwork connections yearly. Vibration and thermal cycles can loosen hose clamps or create small separations. A quick tighten takes seconds and prevents heat loss and inefficiency.
Styling Your Kitchen Around Copper
Once your copper hood is installed, the real design work begins. A bold range hood should anchor your kitchen’s color and material palette, not fight it.
Warm metal finishes work best alongside copper. Pair it with brass cabinet hardware, gold-toned lighting, or warm-toned stainless steel appliances. Cool metallic finishes (chrome, brushed nickel) create visual conflict, mixing them is possible but needs intentional design balance.
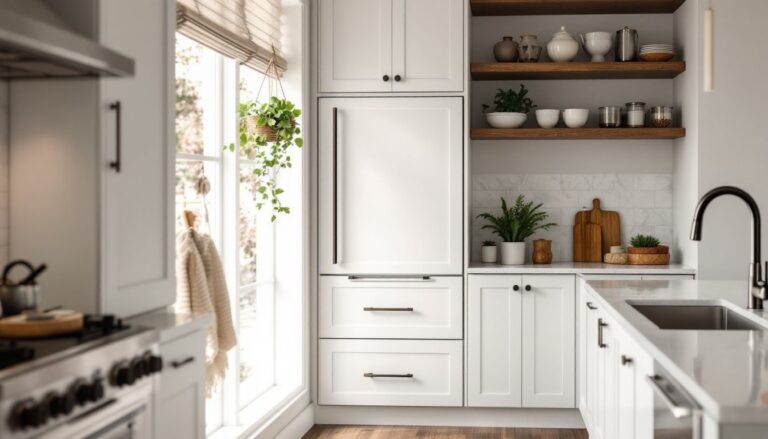
Backsplash choices matter significantly. Subway tile in warm white or cream lets copper shine as the standout. Patterned tile or stone (especially terra cotta, warm beige, or amber tones) creates a cohesive, sophisticated look. Avoid reflective backsplash materials directly opposite the hood, too much competing shine becomes visually chaotic.
Countertop colors should complement rather than match. Dark walnut or honey-toned wood cabinetry pairs beautifully with copper. Light, neutral countertops (white quartz, pale marble, natural stone) keep focus on the hood. Medium-tone wood creates warm harmony.
Lighting deserves attention. Pendant lights over an island topped with a copper hood should echo the metal’s warmth, think Edison bulbs, vintage brass fixtures, or warm LED color temperatures (2700K rather than 5000K harsh white). The Kitchn regularly covers kitchen lighting and design pairings that show copper hoods working in real contexts.
Don’t overcrowd the visual weight. A statement copper hood pairs best with calm surroundings. Too many competing patterns, colors, or metallic accents overwhelm the space. Let the hood be the hero and build supporting layers in neutral tones.
Conclusion
A copper range hood delivers both practical performance and distinctive character that improves with age. Whether you’re drawn to its design appeal, antimicrobial properties, or the way it ties together wood, stone, and metallic finishes, choosing the right style and maintaining it properly ensures your investment stays beautiful. Taking time upfront to measure, plan ductwork, and understand electrical requirements prevents costly mistakes. Once installed and properly styled, your copper hood becomes a kitchen centerpiece you’ll enjoy for decades.